9 Documentation
This feature allows users to document observations, interpretations, or additional information related to specific objects within the analysis. This guide provides a detailed explanation of how to add notes for various objects in the interface.
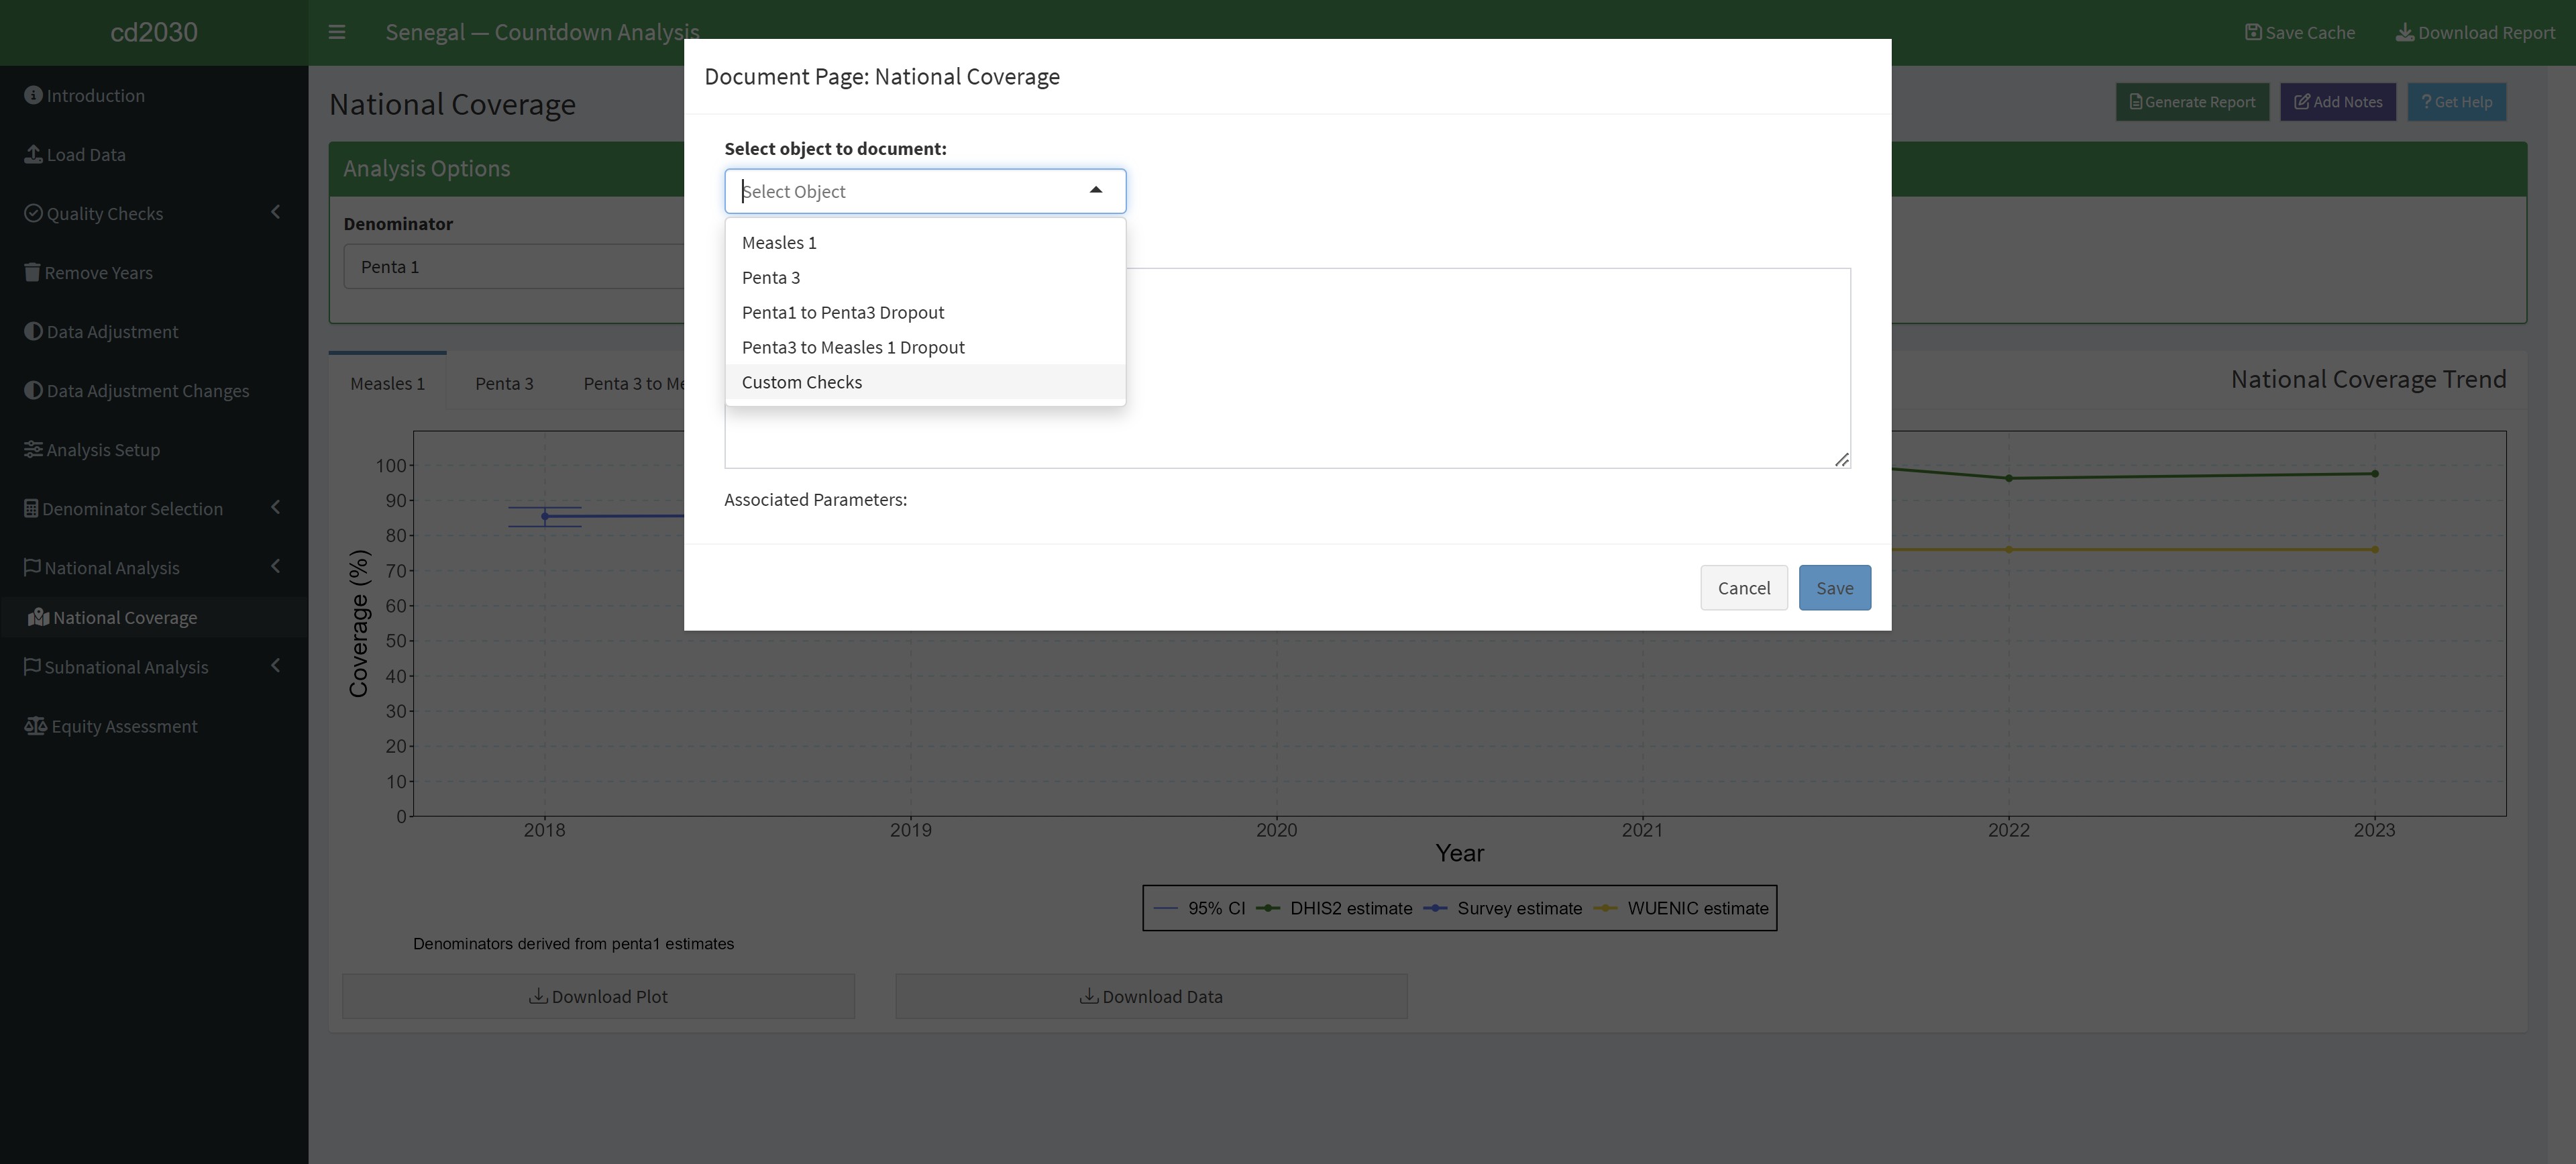
9.1 Steps to Add Notes
9.1.1 Open the Add Notes Dialog
- Navigate to the relevant section of the analysis (e.g., National Coverage).
- Click the “Add Notes” button to open the Document Page dialog.
9.1.2 Select the Object to Document
- In the dropdown menu labelled “Select object to document”, choose the object for which you want to add notes. Examples include: Measles 1, Penta 3, Penta1 to Penta3 Dropout e.t.c.
9.1.3 Enter Notes
- In the text box write your notes.
- Include any observations, interpretations, or relevant comments regarding the selected object.
- Notes can include data trends, potential discrepancies, or contextual explanations.
9.1.4 Save the Notes
- Click the “Save” button to save your notes.
- Ensure a confirmation message appears indicating that the notes have been successfully saved.
9.2 Best Practices for Notes
- Be Specific: Write detailed and clear notes that directly relate to the selected object.
- Use Context: Include explanations for data trends or deviations to assist in later review.
- Organize Content: Use bullet points or short paragraphs for better readability.
- Update as Needed: Edit and revise notes as new observations or data become available.
9.3 Troubleshooting
- Object Not Listed:
- Ensure the object you want to document is part of the current analysis.
- Notes Not Saved:
- Verify that the dialog was not closed before clicking “Save”.
- Retry saving the notes if an error occurs.
- Notes Not Visible:
- Check the saved location or return to the dialog to confirm the notes.